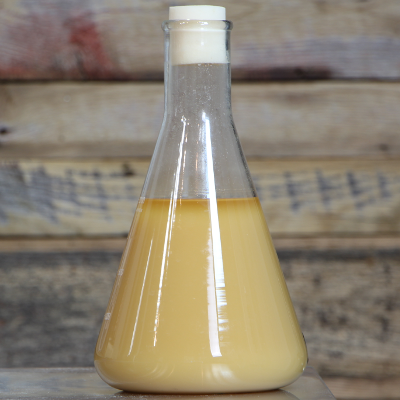
An easy way to step up your brewing game and make better beer is to kick off fermentation with a yeast starter. There are a number of reasons you might want to make a starter - namely, increasing yeast cell count, ensuring yeast are healthy, and reducing lag time to get fermentation going right away. The more yeast cells there are, the more efficiently they can convert the sugars to alcohol. And the sooner fermentation begins, the lower the chance for contamination and off flavors. In short, fermenting with a yeast starter will improve the quality and consistency of your beer.
Equipment Needed
- Gas burner or an electric hotplate
- Sauce pan
- Small funnel

- Sponge stopper
- Scale (and dish for weighing)
- Magnetic stir plate and flask
Ingredients
You'll also need a few ingredients to get the starter going. We're assuming that you're making a starter from a store-bought yeast packet. However, harvested and washed yeast can be used as well. Follow the same process. Also, dry malt extract can be purchased at any decent homebrew shop. Here are the necessary items:
- 1 package of liquid yeast
- 100 grams dry malt extract (DME)
- 1200 ml Water
- Yeast nutrient (optional)
Once all of the equipment and ingredients have been gathered, simply follow the steps below to make a yeast starter.
Yeast Starter Procedure
After you have the equipment and ingredients, it's time to make the actual yeast starter. Here's how it's done.
Step 1: Ask Yourself, If you Need a Yeast Starter
You make a yeast starter by first asking yourself, do I really need to make a yeast starter? And you answer that question by reading the directions on the yeast package which will specify pitch rate.
STEP 2: Measure Water and Dry Malt Extract
Add 1500 ml of water to a pot, and set it to boil. While it’s heating, measure 150 grams of dry malt extract. This will create a starter with an initial gravity of 1.037, which is exactly where you want it. This is a bit more water and DME than a lot of generic recipes call for. I’ll explain why we’ve increased the amounts at the end of this article.
STEP 3: Add Dry Malt Extract and Boil
Once the water is boiling, cut the heat, stir it to create a vortex, and add the DME. Stir until dissolved then heat back up to a boil. You’ll hold the boil for a few minutes and then move on.
STEP 4: Clean and Sanitize the Flask
First clean and then sanitize it with a bit of StarSan. This part is really important because if you contaminate your starter it’ll also contaminate your beer. The bubbles are supposedly fine but I like to shake out as many as possible before moving on. Though, if you’re filming be careful with the camera angle during this part so you don’t become an internet meme.
STEP 5: Transfer Wort to Flask and Chill
Add the wort to the flask and then sanitize a bit of foil or a foam stopper and cover. Either put it in the refrigerator for 2 hours or into a bowl with ice water. Agitate to speed up cooling.
STEP 6: Pitch Yeast
Once the wort is room temperature, pitch your yeast. Our go-to yeast is White Labs since they have the best selection and our homebrew shop stocks a ton of different strains. Sanitize the package, shake well, again, being mindful of the camera angle, and add add to the flask.

I got a bit of yeast on the side of the flask so i’m going to throw on a glove, sanitize it, and shake flask to wash the yeast down into the liquid.
STEP 7: Add Stir Bar
This one is important. Toss the stir bar into some sanitizer then dump it out into your hand to make the biggest mess possible on the table. It’s important to constantly be marking your brewing territory and this is a great way to do it.
STEP 8: Cover Flask
Re apply the sanitized foil to your flask then dramatically whip out the sweet new Clawhammer Supply stir plate from your back pocket. Plug it in and marvel at the awesome new graphics before transferring the flask to the stir plate.
STEP 9: Allow to Ferment
Crank up the speed and leave it sit for 24-48 hours.
STEP 10: Pitch the Starter Into Wort
Once the starter has finished fermentation you can either pitch this straight into your beer, which is actually what White Labs recommends. Or you can put leave it sit so the yeast settles out, decant it by dumping off most of the liquid at the top, reincorporating the sludge at the bottom, then pitching this.
Yeast Starter Pro Tips
We've made a lot of yeast starters. Here is some advice based on the mistakes we've made!
Don't Boil in a Flask
Don't boil your ingredients in a flask. The bottleneck of flasks greatly increases the risk of boil over. This potential is compounded on electric burners which cycle intense heat on and off. If you're worried about boil over, use a sauce pan to boil the ingredients and then transfer into a sanitized flask after.
Use a Calculator
Use a Yeast Starter Calculator to ensure that the proper amount of yeast cells are created and they're grown in a way that produces healthy, unstressed yeast. Most generic yeast starter recipes call for 100 grams of DME and 1 liter of water. Though these standard amounts were created when the standard size for liquid yeast packages was half the size that it is today.
Pitching new, 150 billion cell yeast packages into a starter made to those specifications will result in a high innoculation rate and a lowered growth factor. For this size of packaging, we like to bump the amounts up up to 1.5 liters and 150 grams of DME. If you're unsure how much water and DME to use for a starter, check out our favorite online yeast starter calculator.


Leave a comment